Are you looking for a software that can be used for formatting your personal computer or Don’t have any disk drive installed on your computer? Maybe this article is the right one for you?
You can easily format a personal computer just by having these tools. A USB device, pre downloaded Rufus applications and pre downloaded ISO files of Windows 7 or Windows 10.
Here is the step by step guide on how to create a bootable Windows 7 or 10 USB:
1. Prepare a clean USB Device with a minimum size of 4 gigabytes2. Download the latest Rufus Application in the internet. Here is the link for downloading the Rufus applications.
3. Download ISO files of Windows 7 or Windows 10 Operating System. Here is the link for downloading the Windows Operating System
Now let’s get started:
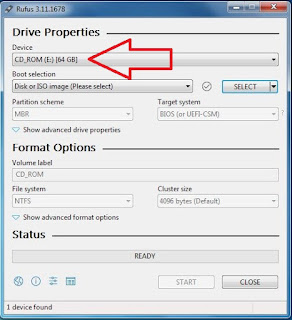
1. Open the Rufus 3.11 applications - As you can see there are no device detected yet.2. Insert the USB Device - After inserting it you can now see a USB device detected in the Device section above.
3. Select the OS to use - In this tutorial I will use the Windows 7. After selecting you can now see it in the Boot Selection.
4. Change the partition scheme to MBR and leave the remaining settings.
6. The process will take several minutes to complete depending on the specifications of your computer.
7. When the process is complete close the Rufus applications. go to Drive E. where the bootable USB is created.
8. Let’s now check Drive E, if all the files is created successfully.
As you can see the files are all created and ready to use for formatting a personal computer and that's it this is the easy to create a bootable USB using Windows 7 or 10.


